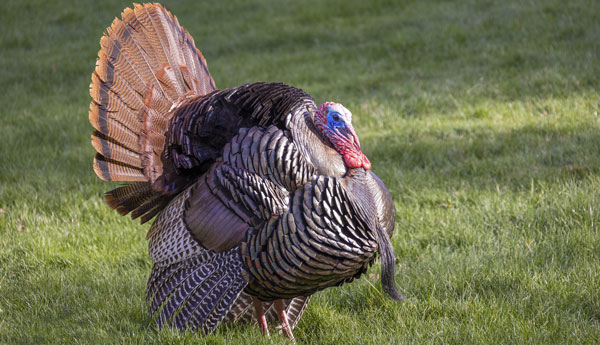
Good day folks. As I sit here at my steam-powered excuse for a computer, I’ve begun to realize something–my writing has taken a distinctly garden-esque turn as of late. Perhaps it was the brisk spring air, or maybe it was watching the little green shoots peek through the dirt, but I’ve been in a distinctly agrarian mood. There’s nothing wrong with that, of course; gardens and the food they produce are a crucial component of homesteading–really a sine qua non. And to be fair, gardening is one of the most intricate parts of the practice, with much to learn to do right, and even more that can go wrong. All that said, there’s far more to homesteading than just things that grow, so I thought we’d begin a fun little series on simple DIY taxidermy. This week, lets start with the basics of a springtime tradition: taxidermy-ing ol’ Tom turkey.
Tracks, Tail-Fans, (Wing)Tips and Talons
If that opening segment got you excited to learn how to mount a whole bird, I hate to burst your bubble, but let me save you some reading time. I am not a professional taxidermist, and mounting a whole bird requires the sort of skills, materials and tools the majority of us (like myself) have no access to. Instead, I will be focusing on the preservation, mounting and display of the fan, beard, spurs and (to a lesser extent) head, the majority of which you can do from the comfort of your own workshop.
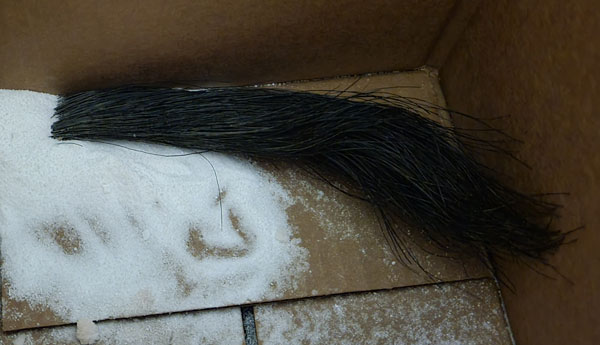
Step one, of course, is trimming these trophy bits off the bird. Let start with the simplest one: the beard. There are two ways to do this. The first, and simplest, is to simply pull the beard toward the head and off the bird. The second is to take an extremely sharp knife and trim a little meat off along with the beard. The advantage of the first is faster drying time. Of the second? More meat means more material for the beard material to hold on to, and less chance it’ll degrade down the road. In truth, I have done both, and neither poses a problem. With the way I display/preserve beards, the additional meat is not really necessary to hold the whole thing in place for very long.
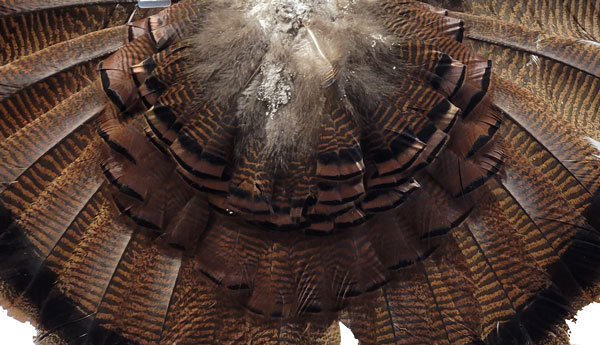
Next up, cut off the fan of the bird. For this, you’ll want to close the fan, and slit from the top of the anus down along the back. Make sure to leave some extra meat and feathers to the rear. It can be trimmed off later, and taking too much initially risks the loss of tail quills. As you cut, keep it going a fair way down the back, as you’ll want to preserve several crescents of feathers in front of the fan as well–makes for a nicer looking mount.
Next up, its time to cut away the spurs. Bend the legs backwards and slit the joint across the knee. Then bend them forward and presto! They’ll come free in a hurry.
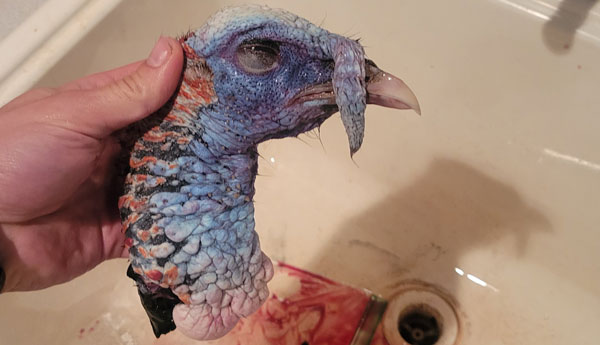
Finally, we make it to the head. Take a sharp knife and cut it clean off. If it gives you some trouble, have a heavy knife or small hatchet handy to hack through the spine. Make sure to be precise with your swings though, as you want to make sure to leave the whole head intact. If its your first time, it may be wise to cut several feather lines below the head, just to make sure you don’t take any material you didn’t mean to. Once detached, roll the skin up like a sock and skin the neck out, cutting the trachea and esophagus away to just below the ears.
Oh, one last thing. If you want to remove any quills from the wing, I’ve found it best to slit down the wing lengthwise, then cut the meat on each side of the quill you’re looking to take, perpendicular to the wing. Some folks use pliers to yank them out, but that’s too much like work for me.
Preservation
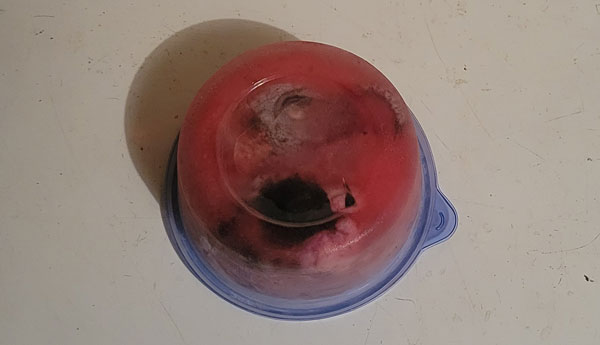
Here’s the good news. Preservation is actually the easy part, even if it does take a little while. Well start with the head. Once its been trimmed and removed in the manner described above, take an old piece of Tupperware you don’t care about, and freeze about an inch worth of water in it. Once frozen, take your turkey head, put it in, and fill the Tupperware with water till it starts to float. Freeze again. Finally, fill the rest of the Tupperware with water and freeze. Why all the hassle? A turkey head encased in ice is far less susceptible to freezer burn, particularly if it may sit for a year or longer before it gets to a taxidermist. From here, you can find a taxidermist who freeze-dries and paints turkey heads in your area, or mail it to a service like freezedrybycathy.com. If you do mail one in, be sure to NOT mail it in the ice block. It will melt in transit and ruin your head. Thaw the ice away, refreeze it and ship it quickly in the most insulated container you have.
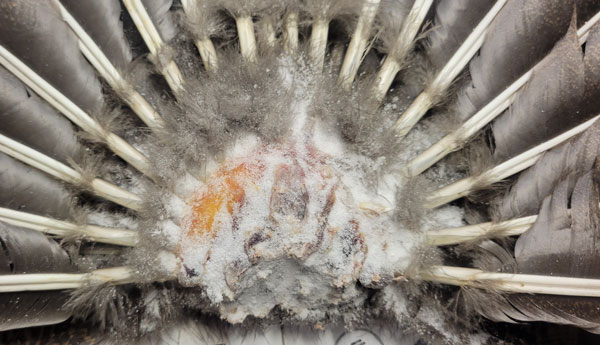
For the rest, the process is simple. Trim away as much excess meat from the back of the fan base as possible, then submerge the base into a water-and-borax brine for an hour, to get a jump on killing mite larvae. Next, some folks prefer the intense drying qualities of salt, while others say the detergent property of borax is the only way to prevent mount-ruining mites (as they die when they eat it). So me? I use both. Make a powder of 50-percent borax and 50-percent non-ionized salt. Once your mix is ready, make sure to position your feet and fan as you wish to display them. For the fan, this means either pinning it to a board, or holding it open with a cheap clothes hanger. While you can see the latter method in the photos here, for the former, simply spread the fan out on some cardboard, and hold the outermost two feathers in place with thin nails or pins in front of the quills. This will hold the entire fan open. For the feet, the easiest method (should you want them standing) is to zip-tie them in a box, as shown below. The reason for this is, once dried, the feet and fan will retain whatever position they dried in, so if you want the feet standing or the fan spread, you must do it now.
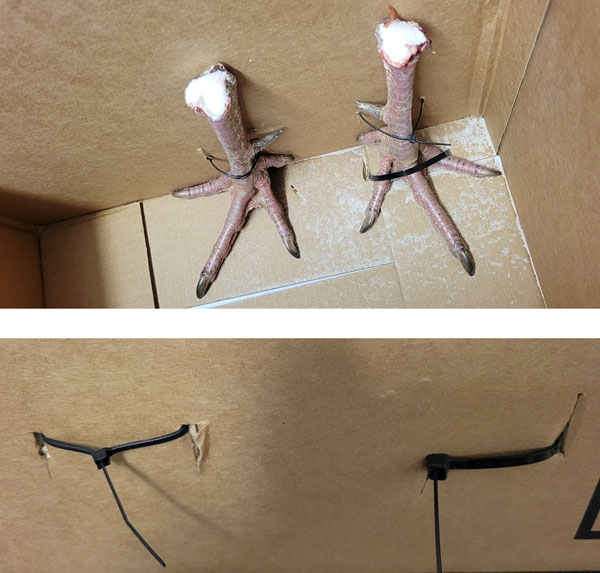
Finally, work the borax/salt mixture into the beard, the tops of the feet and the base of the fan. Check it every day or so, remove when damp, and work in more. Keep doing this for anywhere from a week to several–the length of the process depends a good bit on how much meat you’ve left on, and on the humidity of the atmosphere.
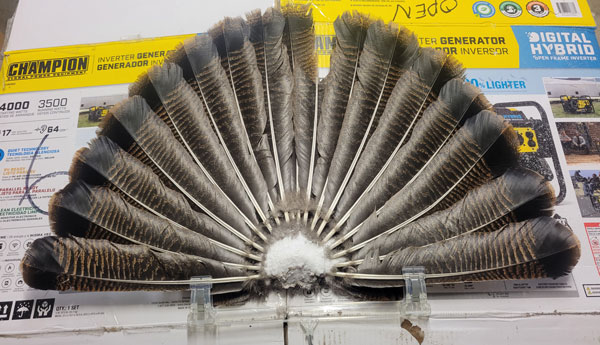
That’s about all the room we have this evening, and to be honest, this year’s fan is still drying. I would prefer to leave the specifics on mounting until I can provide a few more step-by-step visuals, so cross your fingers for some dry weather. In the meantime, perhaps well tackle the much more difficult practice of Euro-mounting a deer skull. See ya next time folks!
P.S. In case your fan is missing a feather or two, its never a bad idea to retains a few extra feathers from elsewhere on the bird. These can be hot glued into any bare spots at the mounting stage.
A humble homesteader based in an undisclosed location, Lars Drecker splits his time between tending his little slice of self-sustaining heaven, and bothering his neighbors to do his work for him. This is mainly the fault of a debilitating predilection for fishing, hunting, camping and all other things outdoors. When not engaged in any of the above activities, you can normally find him broken down on the side of the road, in some piece of junk he just “fixed-up.”

Red Falcon 1325 says
Rediculously expensive is an understatement!