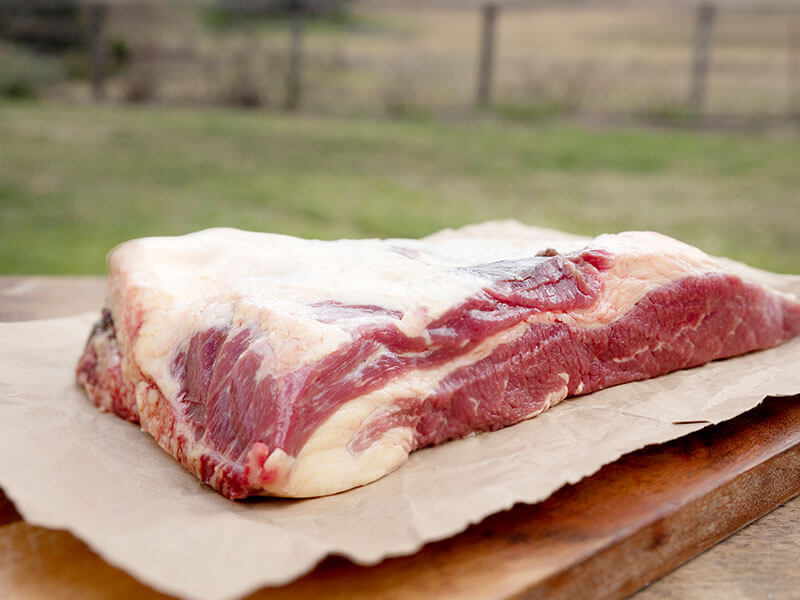
Homesteaders can easily render beef tallow at home, turning beef fat from suet or trimmings into a versatile, shelf-stable cooking fat. This traditional process aligns with the self-sufficient, zero-waste ethos of homesteading, using byproducts from cattle you raise or source locally. Beyond cooking, beef tallow shines in soap-making, candles, balms, lotions, and even leather conditioning.

What is Beef Tallow?
Beef tallow is rendered fat from cattle, typically from suet (the hard fat around the kidneys) or fatty cuts like brisket. By slowly heating the fat, you separate pure liquid fat from solids like connective tissue, then cool it into a creamy, white solid. Think of it like bacon grease, but from cows—a rich, subtly beefy fat with a high smoke point (400°F) perfect for frying, baking, or skincare. Historically, tallow was a kitchen staple, valued for its stability and versatility.
Why Render Beef Tallow at Home?
Rendering beef tallow fits the homesteading lifestyle perfectly. It’s cost-effective, preserves traditional skills, and reduces reliance on store-bought oils. A single cow can yield pounds of tallow, enough for months of cooking or crafting. Plus, it’s packed with fat-soluble vitamins (A, D, E, K) and conjugated linoleic acid (CLA), especially from grass-fed cattle.
Ingredients and Equipment for Rendering Beef Tallow
- Beef Fat: Suet or trimmings from fatty cuts like brisket. Grass-fed beef offers a milder flavor and more nutrients.
- Equipment: Sharp knife or meat grinder, large pot or slow cooker, fine mesh strainer or cheesecloth, clean jars for storage.
- Time: 2-6 hours, depending on the method and batch size.
Steps to Render Beef Tallow at Home
1. Source the Fat
If you butcher your own cattle, save the suet or trimmings. Otherwise, ask a local butcher for beef fat—often cheap or free since it’s typically discarded. Pro Tip: Keep your workspace cold and wear gloves to avoid stickiness.
2. Prep the Fat
Trim away meat, blood, or gristle. Chop fat into 1-inch chunks or grind it for faster rendering.
3. Choose a Rendering Method
- Stovetop: Place fat in a pot with 1/4 cup water per pound to prevent burning. Heat on low, stirring occasionally, for 2-4 hours until fully melted.
- Slow Cooker: Add fat, set to low, and render for 4-6 hours. No water needed.
- Oven: Spread fat in a dish, bake at 225°F for 4-6 hours, stirring occasionally.
- Smoker: Catch drippings in a pan while smoking meat like brisket. Note: Drippings may include seasonings.
The goal is liquid fat with crispy bits (cracklings) floating or settled.
4. Strain the Tallow
Pour hot liquid through a cheesecloth-lined strainer or coffee filter into a clean jar to remove cracklings. Cracklings Bonus: Salt and snack on them, or feed unsalted bits to chickens or dogs.
5. Cool and Store
Let the tallow cool—it’ll turn white and solid at room temperature. Store in a sealed jar in the fridge for 3-6 months, freeze for over a year, or keep at room temperature for 1-2 months in cool, dry conditions.
Tips for Homesteading Success
- Scale Up: Process large batches if butchering a whole cow.
- Quality Matters: Grass-fed fat has a cleaner taste and yellowish tint from beta-carotene.
- Versatile Uses: Fry, roast, or use tallow for soap, candles, or leather conditioning.
- Safety: Use low heat to avoid splattering or scorching, which can cause off-flavors.
Why Homesteaders Love Beef Tallow
Rendering beef tallow is a zero-waste win, turning byproducts into a valuable resource. It sidesteps processed seed oils, offering a pure, local alternative rich in flavor and function. Whether frying potatoes, seasoning cast iron, or making candles, tallow brings homestead ingenuity to life. Learn more about beef tallow cooking benefits or try a unique recipe like beef tallow apple pie on the grill.
Ready to Render?
Making beef tallow is a homesteader’s rite of passage, honoring the animal and reclaiming a lost art. Start with a small batch, then scale up. Plan ahead for preserving your tallow with tips from home canning chronicles. What’s your favorite way to use beef tallow? Share your tips or recipes in the comments!
