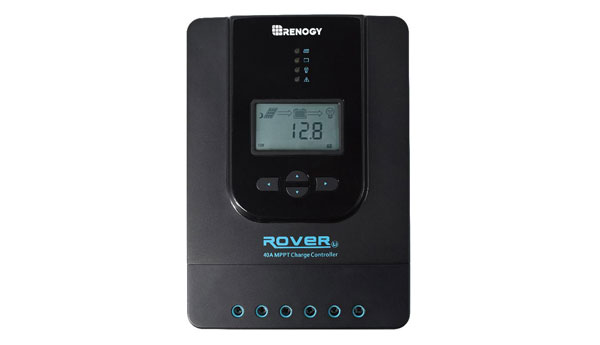
So, you’ve selected a sunny place, laid your panels and fastened them down. Next, you ran all the wiring and hooked them all together into one clean, combined unit. From here, you decide all you need to do is wire in the battery! After all, sun shines on panels, panels emit energy, energy is stored in the battery, right? While that is in some senses true, unfortunately it is not the whole story. Should you set your system up like this, you run a very good chance of damaging, or downright ruining your battery, as sometimes the solar panels can emit far more energy than the battery is capable of holding at the time. To prevent this, you need a charge controller in your system.
How it Works
As mentioned, a charge controller takes the excess power produced by your solar panels, and prevents it from entering your battery (or battery bank). This prevents your battery from overheating, drying out and, in cases where the aforementioned two issues continue long enough unchecked, exploding.
Control
The way it stops this from occurring is through either “on/off control,” or “pulse width modulation” (PWM). The first of these, quite simply, shuts the voltage off at a prescribed level, while the second gradually slows the voltage to a trickle, until the battery is full.This second is more efficient, easiest on your battery, and should be strongly considered if you system will likely see long periods of excess energy, and little use.
How does the controller know when to shut off or slow down energy flow, you might ask? The system is entirely based around set points–aka. the exact voltages at which your system makes the aforementioned adjustments. While more advanced models can be set by the user, I would recommend buying one that comes pre-set, or at least has pre-loaded settings to choose from. This is because both temperature and battery type are extremely important, as to how much voltage the controller allows. For instance, typical deep-cycle lead-acid batteries are either of the flooded (fluid filled) or absorbed glass matt (AGM) varieties. The latter need to be regulated to a slightly lower voltage than the former, lest they dry out and become ruined. Never use a charge controller designed or set for an AGM battery on a flooded system, or vice versa.
While I do recommend you use a pre-loaded system, should you want to use a manual system, here is a rough estimate for what your set points will be, for a 12V battery at 77-degrees Fahrenheit:
High limit (flooded battery system): 14.4 V
High limit (AGM battery system): 14.0 V
Resume full charge: 13.0 V
Low-voltage disconnect: 10.8 V
Reconnect: 12.5 V
Temperature
Next, the concern with temperature is as the battery cools, charging becomes less efficient and may be reduced too soon. Some batteries have built-in temperature compensation which, while always a good idea, is absolutely essential should your battery be exposed to swings of temperature over 30-degrees Fahrenheit (read: is stored outside). Should your battery not have a temperature-compensation feature, you must adjust the set-points manually. Luckily, you normally only need to do this between the changing of the seasons for batteries stored indoors. On a standard 12V battery, the general formula is -.03 V per 1.8°F deviation from standard 77°F.
Discharge
An additional benefit to installing a charge controller, is it prevents the flow of “reverse current.” This is the small trickle of current flowing the opposite direction (out of your battery, usually at night when the panels aren’t active), that can cause a slight discharge. It achieves this goal by passing charge through a transistor, which only allows current to flow in a single direction.
Conclusion
As I’m sure you’ve already gathered, the charge controller resides somewhere between your combiner box, and your battery. Models can run anywhere from $10 to $1000, depending on model and features. Simply ensure the model you’re looking at has a voltage or setting which matches your system (most higher-end models can handle systems running anywhere from 12 to 72 volts). If you’ve purchased an automatically adjusting model, as is my recommendation, simply wire it in, select the appropriate setting for your system and you’re good to go! If not however, you’ve still got some tinkering to do. But follow the example voltages given above, making compensation for temperature as needed using the conversion provided, and you’ll be up and running in no time.
A humble homesteader based in an undisclosed location, Lars Drecker splits his time between tending his little slice of self-sustaining heaven, and bothering his neighbors to do his work for him. This is mainly the fault of a debilitating predilection for fishing, hunting, camping and all other things outdoors. When not engaged in any of the above activities, you can normally find him broken down on the side of the road, in some piece of junk he just “fixed-up.”
