Home Canning Safety: The Botulism Rules Every Homesteader Should Recheck in 2026
The most dangerous jar in your pantry is not the one that failed to seal. It is the one that sealed perfectly. Home canning safety comes down to one thing the lid never tells you: whether the food inside reached a temperature high enough to kill Clostridium botulinum spores. A jar can pop, cool, and sit on the shelf looking flawless while quietly growing a toxin that a single taste can make fatal. Getting this right is not hard, but it is exact.
Originally published: August 7, 2026
Food-safety officials spent this summer repeating the warning for a reason. As gardens flood kitchens with tomatoes, green beans, and peppers, home preservation ramps up fast, and so do the shortcuts. This is the season to slow down and check your method against the food in the jar. If you are new to the process, start with our step-by-step canning and preserving guide and treat this piece as the safety layer on top of it.
Home canning safety: why botulism hides behind a good seal
Botulism is rare, but it is the reason every canning rule exists. The bacterium Clostridium botulinum lives in soil, survives on produce, and thrives in exactly the conditions a sealed jar creates: no oxygen, low acid, and room temperature. When those conditions line up, the spores wake up and produce a nerve toxin that causes paralysis, respiratory failure, and death.
Here is the part that trips up experienced homesteaders. The toxin is odorless and tasteless. You cannot see it, smell it, or catch it by sampling. A jar can look, smell, and sound perfect and still be lethal. That is why home canning safety is built entirely on prevention at the processing stage, not inspection at the pantry stage.
The good news: the toxin is destroyed by boiling, and the spores are destroyed by the sustained high heat a pressure canner reaches. Do the heat correctly the first time and the risk drops to near zero.


High-acid versus low-acid: the one distinction that decides everything
Every safe canning decision starts by sorting your food into one of two buckets. Acidity, measured as pH, determines whether botulism spores can grow, and that determines which canner you are allowed to use.
High-acid foods (pH 4.6 or lower) — most fruits, jams, jellies, pickles, and properly acidified tomatoes — can be processed in a boiling-water bath. The acid itself blocks botulism, so 212°F is enough.
Low-acid foods (pH above 4.6) — vegetables, meats, poultry, seafood, beans, and soups — cannot be made safe by boiling water alone. They demand a pressure canner, which reaches 240°F and holds it long enough to kill the spores. There is no water-bath shortcut for green beans. Not one that is safe.
If you are still deciding on equipment, our guide to a pressure canner rated for your jar size walks through the differences that matter. A canner too small for your batch is a canner you will be tempted to skip.
Tomatoes are the trap — add acid every single time
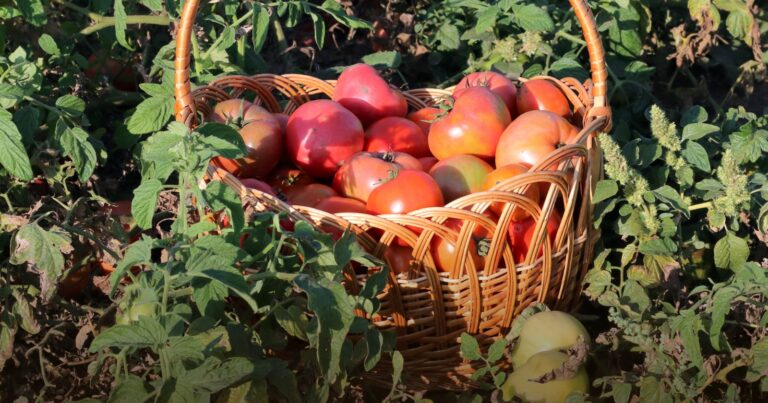
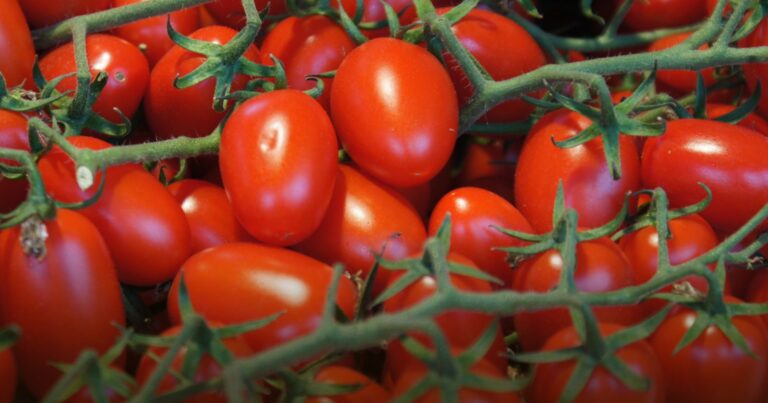
Tomatoes feel like a high-acid fruit, and gardeners have canned them in a water bath for generations. That is the trap. Modern tomato varieties, over-ripe fruit, and blossom-end changes push acidity to the edge of the safe line, and some cross it. You cannot tell by tasting.
The current standard from the USDA and every extension service is the same: add acid to all home-canned tomatoes and tomato products, regardless of variety or method. The University of Minnesota Extension lays out the exact ratios in its tomato canning safety guidelines. For a standard quart, that means two tablespoons of bottled lemon juice or half a teaspoon of citric acid, added to the jar before you fill it.
Use bottled lemon juice, not fresh. Fresh lemons vary in acidity the same way tomatoes do; bottled juice is standardized, and standardization is the entire point.
Water bath versus pressure canner: match the method to the food
The method is not a preference. It is dictated by the food’s acidity. This table covers the common homestead crops and where they belong.
| Food | Acidity | Safe method | Notes |
|---|---|---|---|
| Fruits, jams, jellies | High | Water bath | Sugar helps texture, not safety |
| Pickles, relishes | High (vinegar) | Water bath | Follow the tested vinegar ratio exactly |
| Tomatoes / salsa | Borderline | Water bath with added acid | Lemon juice or citric acid, every jar |
| Green beans, corn, peas | Low | Pressure canner | No water-bath option exists |
| Meat, poultry, fish | Low | Pressure canner | Follow tested time and pressure for your altitude |
| Soups, stews, mixed vegetables | Low | Pressure canner | Process at the time for the longest-processing ingredient |
Altitude matters more than most people expect. Above 1,000 feet, water boils below 212°F, so both water-bath times and pressure-canner settings increase. A tested recipe will list the adjustment. If yours does not, it is not a tested recipe.
The recipe rule: tested since 2009, or do not run it
This is the rule that quietly does the most work. Use only research-tested recipes dated 2009 or later, from the USDA, the National Center for Home Food Preservation, or a Cooperative Extension office. The National Center spells out why in its safety guidance: processing times were revised as testing improved, and older times no longer guarantee a safe product.
That means a handwritten card from a relative, a recipe off a social feed, or a blog that does not cite its source is not a foundation for home canning safety, no matter how many summers it seemed to work. “Seemed to work” is survivorship talking. The jars that failed are not around to warn you.
Keep a printed, dated reference in the kitchen. When the harvest is coming in faster than you can process it, the pull toward “close enough” is strongest, and that is exactly when a tested chart earns its place on the wall.
The home canning safety checklist to run before every batch
Run this before every batch. None of it is complicated; all of it is the difference.
- Sort the food by acidity. High-acid to the water bath, low-acid to the pressure canner. Decide before you fill a single jar.
- Pull a tested recipe (2009 or later). Match the exact jar size, headspace, time, and pressure it lists.
- Inspect jars and lids. Discard chipped rims. Use new flat lids every time; bands and jars can be reused.
- Acidify tomatoes. Bottled lemon juice or citric acid in every jar, no exceptions.
- Adjust for altitude. Look up your elevation and use the recipe’s higher setting.
- Verify the pressure canner gauge. Have dial gauges tested annually by your extension office; weighted gauges do not need testing.
- Cool undisturbed, then check the seal. Let jars sit 12 to 24 hours before you move or wash them.
Overflow you cannot process safely does not have to be lost. Dehydrating is a low-risk fallback for a countertop full of tomatoes or beans, and our homestead harvest guide to dehydrators covers the crops that dry well. When in doubt on a low-acid batch and short on pressure-canner time, drying beats guessing.
When to throw it out — and why you never taste-test
Discard any jar that shows a bulging or unsealed lid, leaking, spurting liquid, an off odor on opening, mold, or a cloudy, foamy look you cannot explain. Do not taste it to decide. The toxin gives no warning on the tongue.
Dispose of a suspect low-acid jar carefully: the current guidance is to detoxify it by boiling the contents and container, or to seal it in a bag and discard where children and animals cannot reach it. When a whole batch is questionable, the jars are worth less than the harvest that replaces them next week.
Everything above is the same discipline that has you planting a fall food plot in July: a small, deliberate effort now that pays off through the cold months. A safe pantry is self-reliance you can eat.
Frequently asked questions
Is home canning safe for beginners?
Yes, when you follow a tested recipe and match the method to the food’s acidity. Home canning safety is not about experience; it is about precision. A first-timer using a 2020 extension recipe and a properly gauged pressure canner is safer than a veteran running a 1970s card from memory.
Can I water-bath can green beans if I boil them long enough?
No. Green beans are a low-acid food, and no amount of boiling-water time reliably kills botulism spores. They require a pressure canner reaching 240°F. This is the single most common and most dangerous canning shortcut, and there is no safe version of it.
Why do I have to add lemon juice to tomatoes?
Because modern tomatoes sit near the border between high- and low-acid, and you cannot measure the difference by taste. Adding two tablespoons of bottled lemon juice per quart guarantees the acidity that blocks botulism, whatever the variety or ripeness.
How long does home-canned food stay safe?
Properly processed and stored in a cool, dark, dry place, home-canned goods keep their best quality for about one year and remain safe well beyond that if the seal holds. Label every jar with its contents and date, and rotate oldest to the front.
Do dial pressure gauges really need testing?
Yes. A dial gauge that reads high can leave your food under-processed without any visible sign. Most Cooperative Extension offices test them free or for a small fee, once a year before the season. Weighted-gauge canners are exempt because the weight is fixed.
The bottom line on home canning safety
The jar that sealed perfectly is only safe if the heat got there first. Sort by acid, use a tested recipe, acidify every tomato, pressure can every low-acid food, and never let a good seal talk you into skipping a step. Do that, and the pantry you fill this summer is one you can open all winter without a second thought.
By James Nicholas. Updated July 24, 2026. Sourced from the USDA, the National Center for Home Food Preservation, and Cooperative Extension guidance current as of publication. This guide is educational; when a recipe or situation is unclear, consult your state extension office before processing.


Reader Favorites
- Dehydrators and Freeze Dryers: A Comparison for Food Preservation
- Seal the Deal: The Home Canning Chronicles – Preserving Flavor, One Jar at a Time
- Thriving in the Chill: A Guide to Winter Gardening
- Render Beef Tallow at Home: Master Homesteading Fat Now
- Hantavirus Prevention Tips for Homesteaders
- Top Homesteading Trends in 2026
Homestead reference charts
Three field guides worth bookmarking — canning times, cellar storage, and safe cooking temps.
| Food | Pressure | Pint |
|---|---|---|
| Green beans | 10 lb | 20m |
| Corn | 10 lb | 55m |
| Tomatoes | water bath | 35m |
USDA/NCHFP processing times & pressures for common foods.
View full chart →| Item | Store | Keeps |
|---|---|---|
| Onions | cool, dry | 9 mo |
| Potatoes | cellar | 4–6 mo |
| Apples | cellar | 6 mo |
How long fruit & veg keep in the cellar, fridge and freezer.
View full chart → Network| Doneness | Target |
|---|---|
| Rare | 125–130°F |
| Medium-rare | 130–135°F |
| Well-done | 160°F+ |
Safe pull temps for steak & burgers, from Popular BBQ.
View full chart →